
When we finished renovating our downstairs bathroom back in April, I did a “reveal” over at Decor8 detailing all of the real-life costs associated with this kind of project. Unfortunately, there was subsequently a data loss at Decor8, and Holly lost all of the comments (including the answers to a lot of questions people had about the renovation). There are also some errors in the price breakdown, so I figured I might as well post the photos, interview, and correct information here for the sake of keeping it entire project archived in one place.
What inspired the design of this room?/How did you decide upon the colors & overall style?
The architecture of my house is the base inspiration for everything I do within it. As a Modernist living in a Victorian-era house, I try to be very respectful of its original structure and character while still moving forward and not trying to create a faux-Victorian look. This attitude toward renovation (particularly when it comes to kitchens and bathrooms) is quite prevalent in Scandinavia, but in this country there is a still a tendency to try to make newly renovated spaces look “old”, and unfortunately the result is usually more of a pastiche than anything.
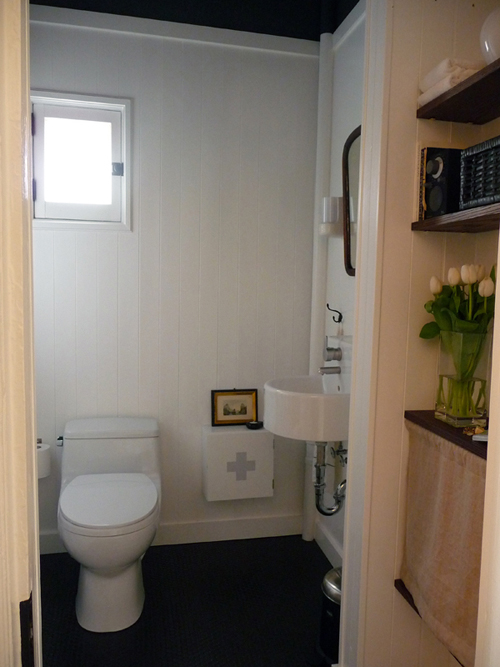
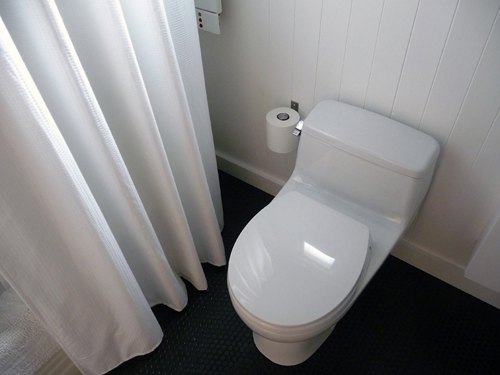
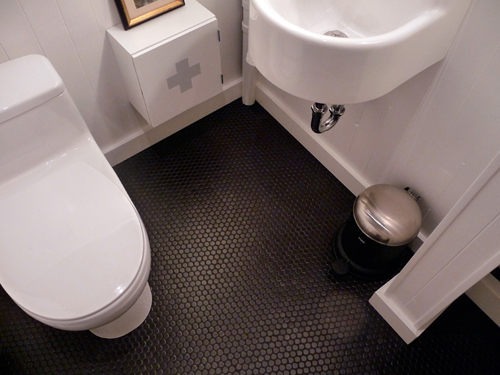
That said, I have tried very hard with both of my bathroom renovations to not make them look too “new”, either! The last thing I want anywhere in my house is for someone to open a door and immediately know that a particular room was recently renovated. My house is full of quirks and imperfections, and I have deliberately carried them into this space. This bathroom was added to the house sometime in the 1930s or ’40s (the space it’s in was originally a pass-through pantry connecting the entry hall to the kitchen at the back of the house), and I elected to keep the cast iron corner tub that was installed at that time. The old toilet was very cute, but it was terribly inefficient—rather than replace it with a “faux-old” toilet, though, I prefer the honesty of a very contemporary-looking one-piece.
But back to the question, you could say that every design decision I make in my house is inspired by Modernism, Industrialism, honesty of materials, and contrasts between old and new.
What is your favorite thing about this space?
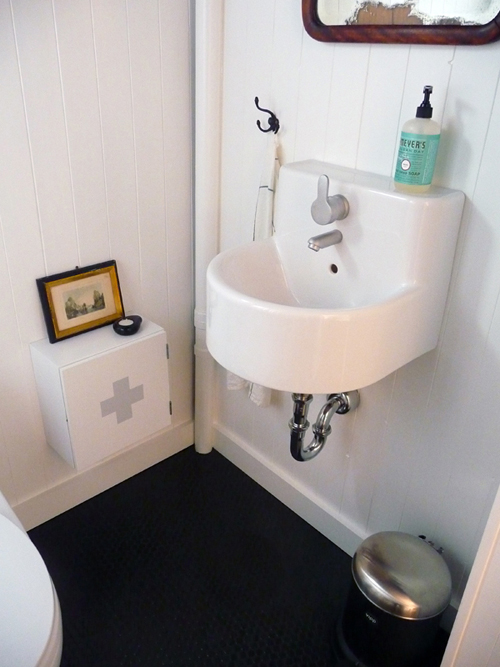
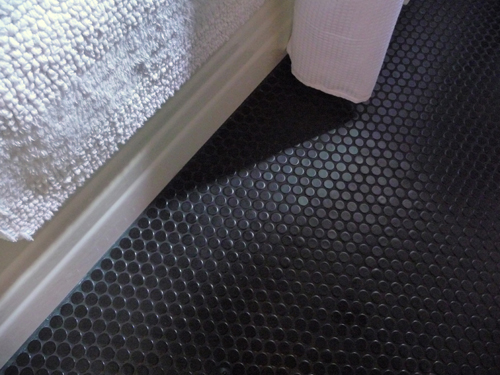
The floor. The effect of the monochromatic matte black penny tiles and black grout is very subtle, but in the light it shimmers in the most beautiful way. It feels wonderful underfoot as well. This was one of the very first things I decided on for the bathroom, and I’m so glad I never had second thoughts.
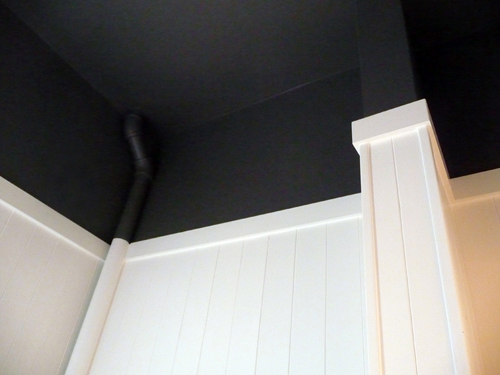
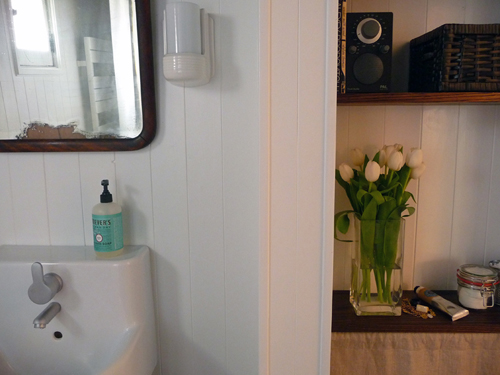
I need to give an honorable mention to the black paint, too. The bathroom is only about 5×6 feet, but the ceiling is more than 10 feet high! By carrying the white paneling and wall tiles to a uniform 8 foot height and then painting the upper portion of the walls and ceiling black, I was able to give the room a greater feeling of width and space. It’s an illusion that really works. I can’t believe how much more spacious the room feels now!


At what point did you know when to quit?
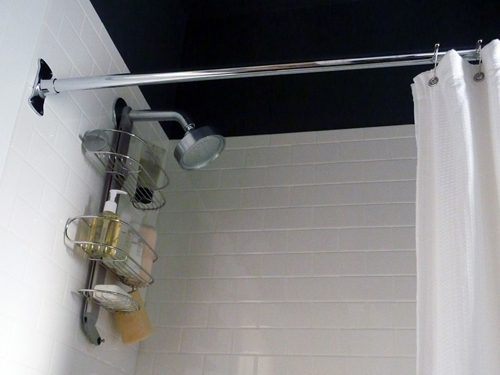
Because my husband and I did the entire renovation (excluding the plumbing) ourselves, we were bound by our own limitations of what we could devote in terms of skills and time. We are both willing to read, ask questions, watch, and learn, but we know when to reign ourselves in (most of the time!). We spent about six months on this renovation, and it really took up almost every moment of our free time for the duration. When we were in the planning stages, we had all kind of ideas (like turning the space into a fully-tiled shower room) that we had to nix in favor of reality. As far as finish work goes, I’m pretty good at knowing how much is enough. I look at rooms the same way I look at 2D print design—I include enough to achieve balance, but remove extraneous materials that aren’t essential functionally or visually. For example, I had initially considered using a very bold Marimekko print to make a shower curtain, but after painting the ceiling, I decided to let the impact of the black against the angles of the white walls be the “stunner” of the room—even unbleached linen ultimately proved to be too overwhelming as a shower curtain! I ultimately went with a classic white waffle-weave, which recedes nicely while still adding a different texture to the room.


COST BREAKDOWN:
Plumbing: $1495
Toilet: $425 / TOTO Eco-Supreme
Sink: $80 / IKEA ÅNN (not online)
Tub: $0 / semi-original to house
Sink faucet: $80 / IKEA ÅNN
Tub faucet and trim: $675 / Kohler Purist
Shower wall tile: $100 / 3×6 gloss white, American Olean
Floor tile: $310 / matte black penny rounds, Nemo Tile
Plywood subfloor: $50
Underlayment: $70 / Easymat
Tiling supplies (grout, caulk, thinset, tools, etc.): $270
Sconces: $200 / Truman, Schoolhouse Electric
Ceiling light: $130 / Alabax, Schoolhouse Electric
Towel radiator: $500 (eBay, 1/2 price) / Omnipanel, Runtal
Electrical supplies (outlets, Romex, etc.): $105
Cement board: $50
Sheetrock: $15
Insulation: $35
Construction adhesive: $20
Joint compound: $10
Vapor barrier: $20
Tongue & groove wood paneling: $120
Wood trim: $80
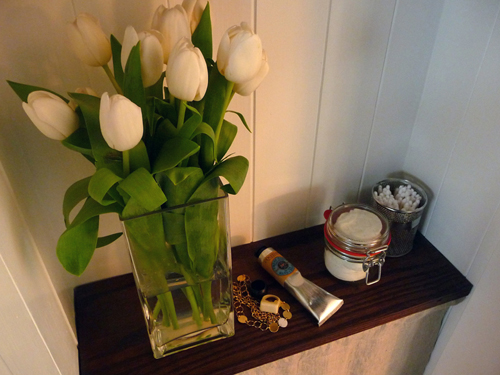
Wood shelving: $32
Saddle: $12
Screws, nails, etc: $50
Miscellaneous building materials: $200
Primer: $20 / Zinsser Bulls Eye
Ceiling paint: $20 / Olympic Knights Armor (eggshell)
Wall/trim paint: $100 / Benjamin Moore Simply White (satin)
Painting supplies (brushes, rollers, etc.): $40
Shower curtain rod: $170 / Vintage Tub
Shower curtain liner (2): $20 / Target
Shower curtain: $50 / Bed Bath & Beyond
Shower curtain rings (2): $22 / Bed Bath & Beyond
Shower caddy: $40 / Simple Human
Trash can: $249 / Vipp
Bath towels: $20 / IKEA BÅVAN
Hand towels: $7 / IKEA ADMETE
Bath mat: $18 / West Elm
Mirror: $0 / family antique
Towel hooks: $0 / original to house
Toilet paper holder: $5 / IKEA GRUNDTAL
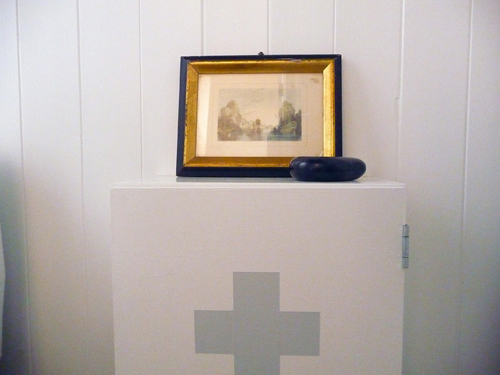
Medicine cabinet (painted): $20 / IKEA FÖRHÖJA (not online)
Square vase: $6 / IKEA REKTANGEL
White vases: $18 / IKEA SALONG
Fresh tulips: $7 / Adams Fairacre Farms
Basket: $6 / IKEA BÖLSNÄS
Radio: $220 / Pal, Tivoli Audio
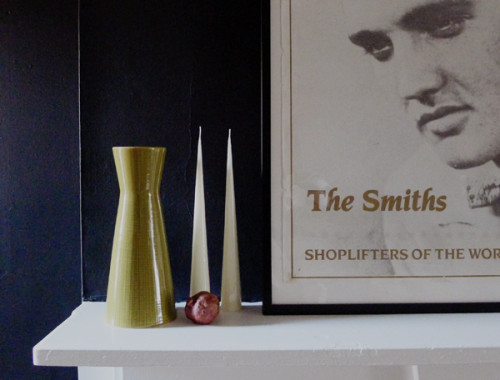
Tealight holder: $2 / West Elm (not online)
Painting of Hudson River: $1 / junk shop
GRAND TOTAL: $5,745 (plus 6 months of weekends!)
52 Comments
Oooh. Pics, List, Prices and Links. All in one place. Thanks Anna! Consinder this page bookmarked!
I like the sensitive approach you take to redoing a historical building. I agree that the pastiche Victorian does no favors.
Kudos to understanding the power of grout. I think a lot people don’t realize that grout isn’t just utilitarian; rather, it serves an important role and what you choose will effect the overall feel of the space.
The floor is genius, I absolutely adore it.
Stunning.
I loved this bathroom when I first saw it on Decor8! So nice to see the photos again!
Now that you have lived with the bathroom for some time, I’m curious – is there anything you would have done differently?
This is such a tasteful renovation. Thankyou for posting the details. I have a somewhat similar situation with our home where we have a character/period home but our furniture/styling leans towards mid-century modern. Our bathroom had been renovated by the previous owners in a faux-period style but it was done badly. I am pleased to see successful examples of what I would like to achieve with our renovations.
Thanks for re-posting Anna, this is such a great resource and was one of my favorite posts ever!
Love, love, love this bathroom! If I weren’t stuck with a rental bathroom, I’d have black penny rounds on my floors too.
I love the black on black floor! The details are what really get me though. The handpainted cross, patina on the mirror, and the little framed artwork. Your eye for design is so spot on, but your personal touches really go a long way!
Thanks for re-posting this! I noticed that the entry was gone on the other site, and mourned it.
I’m so glad you re-posted this! I LOVE this bathroom, and I think the original was the first post that ever led me to your site. It has inspired some of the changes I’ve made to my own bathroom so far, and some of those that are still to come.
I just had a question about the floor tiles… I believe you said you did the tile work yourself, but did you find those tiles more difficult to install than square or rectangular tiles? I’ve heard that it’s hard for ‘DIY-ers’ to make sure the sheets are placed properly, without strange gaps. Since (if I ever manage to find a source for them in Canada!) I plan to install them myself as well, I just wondered if you had any installation tips?
Thanks!
I *love* those floor tiles.
amy: Honestly? We are 100% happy with this bathroom, and wouldn’t change a thing. I wish it hadn’t taken 6 months to finish, but what can you do?
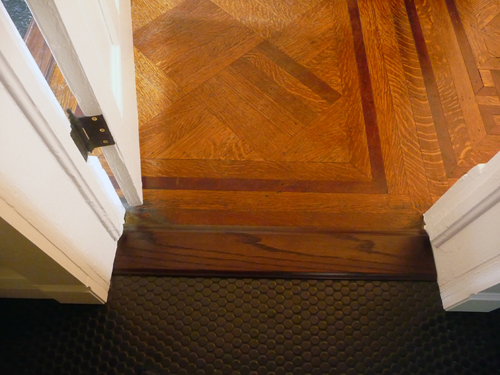
Kerry: I did all of the positioning by sight, and I didn’t work from the center of the room out like you’re supposed to. Instead, I started using the tub as a straight line guide. The only time I have trouble with alignment was when I reached the threshold, because our walls don’t meet at 90deg angles. I had to fudge a tile or two here and there, but you really can’t tell. The only tiling I’ve ever done is in this bathroom, so I don’t have much to compare it to, but it really wasn’t hard — just time-consuming. 😉
Thanks for posting this again. This is such a perfect renovation for both your home and your personal style. Amazing!
I never notice before that the medicine cabinet was hung so low. Why was that?
This reno is just beautiful. Classy, classic, modern and super effective!
Those Scandinavians sure know how to inspire people!
Just love the floor in the space! The finishes are nice also! Great job!
Thanks for re-posting! Your modern view in an older home is always inspiring.
Well, I love it. We are doing research right now to remodel two bathrooms, I am very, very excited. I love the labour of it, but my husband is not so handy, so it will be fun to watch unfold. Your blog is constant inspiration.OH! I refurbished my windows, three original 1920’s wooden windows and oak trim, painstakingly, due to a post on your blog. Hubs wanted to replace them, but I insisted we clean them up. It took weeeeeks, but they look amazing now, even my very handy father is impressed. Thanks fr the inspiration.
Interesting post. We have been in our home 16 years, and I have been remodeling it all this while. I am now working on an elaborate home theater, then it’s on to a new kitchen. What I really want to do is something else, and it’s really a challenge, because our space is so limited. One of the things that has really helped me is the Internet, because there are so many extraordinary ideas out there these days. I think the kitchen is pretty locked in, because of the small size of it, but bathrooms, as it turns out, are really wide open. There are a TON of ideas for them, and I find new ones every day. Probably the hardest one in that department will be just deciding on something. What you’ve posted just gives me even more ideas to think about, but that’s OK too, I guess. Who knows? Maybe one find day I will come up with something really slick. At least I hope so!
Thanks so much for this post! I’m a huge fan!
Are the penny round tiles made of porcelain or ceramic?
I adore the floor, but I’m wondering if you can share your thoughts about continuing or contrasting the colour value of flooring from one room to another. It’s something I’m thinking about for our bathrooms, which adjoin reclaimed oak in the hallway.
coincidentally, i pulled this up while my husband is doing the dishes in the other room with mrs meyers basil soap so it is like a scratch ‘n sniff post. cool!
K… just found your blog a couple of months ago and am in LOVE with everything you do! And this bathroom.. EEEeeeek!! .. it’s AWESOME!! I am building my own house (right now) and want to put some panelling in my living room. What kind of tongue and groove did you use in there?? I can only find pine in the length that I need but I’m afraid after I paint it white, I will see the knots!! What about bead board? AHHHhhhh .. I’m so indecisive.. any tips??
Cassie: The cabinet is hung low to encourage small visiting children to ingest facial creams and toothpaste without having to ask permission first. (No, I just think it looks good that way!)
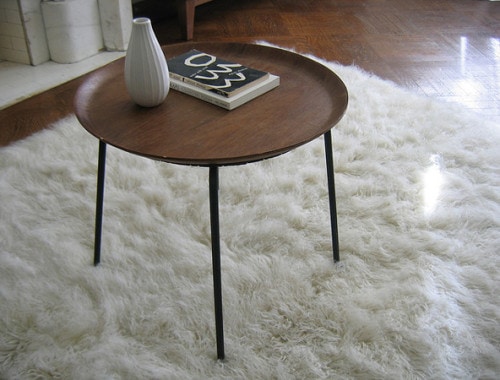
Ksenia in Canada: The floor tiles are matte glazed ceramic. I’m not sure I have a feeling one way or the other when it comes to contrasting or matching the value of floor colors from room to room — it really depends on the house and the type of flooring. Our kitchen floor (which you can see a pinch of on the left in the photo that shows the wood floor in our dining room) is also black, but upstairs our white marble bathroom floor and white painted office floor adjoin the oak floor of the hallway, so…clearly I can go either way!
Amanda: That’s just regular old pine tongue-and-groove paneling from Home Depot. Before installing the paneling, you need to cover the knots with a shellac-based primer (like Zinsser BIN Primer-Sealer Spray) first, then use a good primer (I like Zinsser Bulls-Eye) on BOTH sides of the paneling to prevent warping. As long as you get the shellac in there, though, you shouldn’t have a problem with the knots bleeding through.
I must congratulate you on this project because I’m quite impressed by how you’ve managed to marry different styles together so well. And of course seeing how you’ve done everything (or almost) by yourselves, it’s quite an achievement.
It’s still one of the most beautiful bathrooms I’ve ever come across, you have such good taste 🙂
sigh, i STILL love this bathroom. so good.
so so inspiring, once again! i just love the black and white theme, and those penny tiles (i know how hard this stuff is to do diy, after doing similar tiles in my kitchen). this will be a great reference when i go to spruce up my guest bathroom!
It is one of the most amazing bathrooms ever. And I can’t believe you did it all (except the plumbing) yourselves. Especially the tile.
I recently took a home repair class, and from tiling there I know if I attempted this it would not turn out right. That’s interesting about starting from the tub first — with this kind of tile that makes sense because the line against the tub will be the most obvious thing (whereas with big square tiles you would first notice whether the square is in the middle).
What kind of tile cutter did you use?
We have one bathroom with wrecked panelling from the 1890s and we may be forced to gut it. But I fear if we tried to tile the room ourselves we would have huge seams in corners and tile that isn’t level.
mopar: We didn’t use anything special for a tile cutter, just one of those inexpensive guillotine-style ones from Home Depot. Fortunately, we really only had straight cuts to make.
I did a lot of eyeballing and compensating with spacing when I was tiling to accommodate the unevenness of the walls and floor. In an old house, you kind of have to forget about things like spacers (and rules) and just go with your gut.
I don’t see a picture here, but I borrowed your toilet paper shelf idea for my basement bath remodel.
Genius! Thanks for sharing.
Thanks!
Yes so sorry again for that Anna — I felt terribly when it happened and now I feel even worse seeing this post! Ha ha! But it’s good you’ve posted it again because perhaps you can reclaim some of those comments, you had quite a number of them, I think over 50 or 60 on decor8 and many, many questions. Thank you so much for your kind understanding during the server issue. I since had to buy a dedicated server and though I spend more money than I ever imagined I’d have to spend on a blog (LOL) at least I’ll now never lose comments (or posts) again. Stability costs money!
Again, so sorry for that data loss, the post is still on my site and was fully restored but the comments were not. 🙁
Much love to you and enjoy all that Swedish music and hopefully some yummy traditional foods too.
Miss you…
xo
Holly
Hi Anna,
I remember reading here somewhere that you had a hard time finding sanded black grout for the floor and you listed where you finally found it. Can you remind me where that was?
Thanks!
Cate
I am blown away and don’t know where to start.
1) Love the very detailed price breakdown! I hope you consider continuing that format in your future shared endeavors as it is so informative and helpful.
2)I had not seen black paint used for that height effect before. It’s genius.
3) The black penny tile with black grout is absolutely to die for.
4) Doesn’t Mrs. Meyers packaging inspire? Sometimes I just sit and stare at it – her cleaning products are the only ones I don’t hide in a cabinet.
Excellent results. And how very generous to share your sources & costs for everything!
Hi Hi!
You say “By carrying the white paneling and wall tiles to a uniform 8 foot height and then painting the upper portion of the walls and ceiling black, I was able to give the room a greater feeling of width and space. It’s an illusion that really works.”
Can you elaborate on that a little bit? I have a long, tall, narrow bathroom and like this idea, but don’t quite understand the theory behind it?
i love your bathroom – it has completely inspired my bathroom renovation. i want to achieve the same effect with the matte black penny rounds – and i am also wondering where you found sanded black grout. i remembered reading about it here somewhere but can’t seem to find it now. thanks!
Branwen: You should have no trouble finding black sanded grout anywhere that sells tiling products. The tricky part was finding sanded black caulk, which I needed to fill the gap between the floor tile and the tub. Tec makes it!
Thanks for the tip, Anna. I found tec’s sanded caulk on line but can you please tell me the color you used? the link from your site to installersstore.com brings us a page with charcoal gray and raven. I assume Raven is the one the get but please let me know if that’s not the case. Thanks!
LOVE LOVE LOVE this. After looking at the before pics on flickr I’m wondering what you did with the space at the end of the tub by the toilet? just curious…..
I love this bathroom.
That toilet is very cute. How are you liking it? I need to buy a new one for a small bathroom and I can’t make up my mind.
Very nice space – I am loving the images of your home. There is something so personal and practical about ‘real’ homes!
Love it!
I’m really curious what your process was like with the ENJE blinds. I read your previous blog post about them, but I was uncertain the exact order: do you remove fabric completely from both top and bottom rod, trim it, and then reattach to the newly cut rods? or just remove the bottom rod and cut the fabric while still attached to the top, then cut the top rod, and slip on the bottom?
The reason I ask is because I just tried the latter method and am now having issues with the blinds rolling up incorrectly (a little crooked). I’m guessing I didn’t reattach the fabric on perfectly straight.
Anyhow, thought I’d ask before trying to do another one. Thanks!
Anna — Can you tell me the color of the grout and caulk used on your bathroom floor? Was it the Charcoal Gray or Raven? Thanks much! Great work!
I don’t remember the color name, sorry. Whatever was blackest!
Anna — I also used black penny tile in my bathroom and am starting to see areas of the black grout turn white-ish — or get a white film. Have you noticed that? Any advice on how to clean it? Thanks!
No, I haven’t. Sorry! 🙁
Hi Anna! The bathroom is fantastic, stumbled on it through pinterest. We are usung the same tiles for our backsplash, do you recall the grout you used? Brand and color? Trying to find something to make it look seamless but since it’s not a bright white, our first grout choice, Snow White, was a little too bright… You may not recall, but it looks like you found a close tone so wanted to ask! Thanks!
Hi Elizabeth, I honestly don’t remember the name, but it was the brightest off-the-shelf white they sell at Lowe’s.
Hi Anna!
Tom and I bought a house last June and have been working on our bathroom ever since… little by little. I’ve always wanted to re-do a bathroom ever since seeing you go through the process years ago and here we are. We should be tiling in a weekend or two (it is pretty crazy how time works, isn’t it?) and I am yet another person commenting here hoping you have a memory for the materials used in your install!
I’ve been doing research on tile adhesives, mastic vs. thinset. Our tile shop sold us mastic for the walls but everything I’m reading seems to be pointing to thinset being preferred. Based on your list above, it looks like you used thinset w/ the 3×6 tiles. Any thoughts on this?
M
I’ve never used mastic for anything! I’d suggest checking with the good people on the John Bridge forums if you have any questions before getting started—I’m certainly no expert.
http://www.johnbridge.com/vbulletin/
What would we even do without the good people of the John Bridge forums? They kindly steered me toward thinset, even if it means losing $$ on the mastic we already have. Having a well waterproofed shower that is going to last a long time is definitely worth more than a bucket of mud to us. Glad to know you are on the thinset side as well. Thanks, Anna!